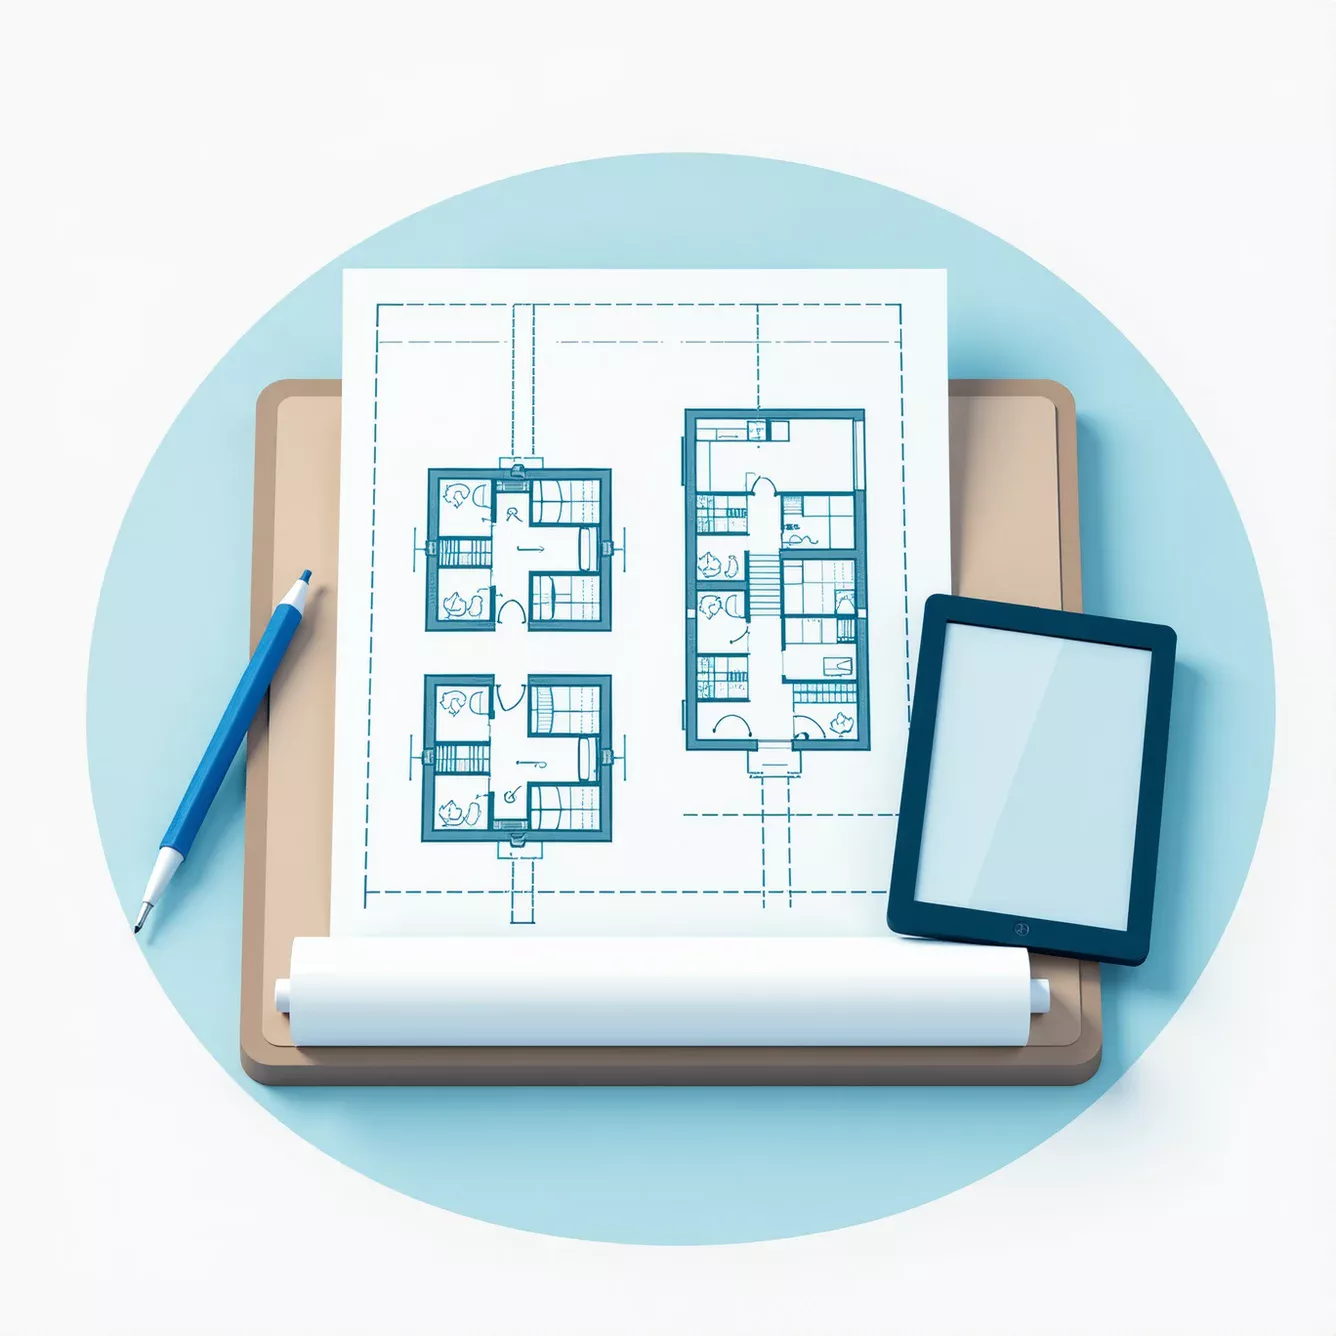
International CAD Drawing Standards: A Comprehensive Guide to ISO for Technical Documentation

In today's globalized economy, an architectural design conceived in Berlin might be engineered in Mumbai and constructed in Dubai. This international collaboration is the hallmark of modern architecture, engineering, and construction (AEC), but it also presents a significant challenge: communication. How can teams from different countries, cultures, and companies work together seamlessly on a complex project? The answer lies in a universal language—not of words, but of lines, symbols, and structure. This is the language of standardized technical documentation. Without a common set of rules governing how drawings are created and interpreted, the risk of miscommunication skyrockets. A misplaced decimal, an ambiguous line, or a disorganized file structure can lead to costly rework, project delays, and even structural failures. The financial implications are immense, turning what should be a collaborative effort into a source of friction and loss.
This is where the International Organization for Standardization (ISO) plays a pivotal role. As an independent, non-governmental body, ISO develops and publishes international standards to ensure quality, safety, and efficiency across nearly every industry. For the AEC sector, ISO standards for technical product documentation provide the essential framework for clarity and precision in CAD drawings. Adhering to these international guidelines offers a profound advantage over relying on local customs or company-specific practices. While a local standard might work for a domestic project, it creates a barrier to entry for international partners. Company-specific standards can be even more limiting, hindering collaboration even with local firms. By adopting ISO standards, organizations position themselves as globally competent partners, capable of integrating into any project workflow, anywhere in the world. At ENGINYRING, we have built our reputation on this principle of precision and universal clarity. We understand that a drawing is more than a picture; it's a contract, a set of instructions, and the single source of truth for a project. This guide will provide a deep dive into the key ISO standards that govern CAD documentation, offering a blueprint for organizations looking to achieve international compliance and excellence.
Core ISO Standards for CAD Documentation
To navigate the world of international technical documentation, it's essential to understand the foundational ISO standards that provide the rules of the road. These are not merely suggestions but are comprehensive frameworks developed through global consensus to ensure that a drawing created by one professional can be perfectly understood by another, regardless of their location or native language. Three families of standards form the bedrock of this system: ISO 128 for the visual presentation of information, ISO 5807 for process documentation, and ISO 13567 for digital organization. Mastering these core standards is the first step toward producing truly world-class technical drawings.
2.1 ISO 128 Series - Technical Product Documentation
The ISO 128 series is perhaps the most fundamental standard for any CAD professional. It establishes the general principles of presentation to be applied to technical drawings. Its primary goal is to ensure unambiguity and clarity in visual communication. This extensive standard is broken down into numerous parts, each addressing a specific aspect of the drawing.
- General principles of presentation: This covers the basics of how information should be laid out, including the uniformity of the drawing practice.
- Line types, weights, and conventions: ISO 128 defines a specific set of line types (e.g., continuous thick for visible outlines, dashed for hidden features, chain thin for center lines) and assigns a hierarchy of line weights to create visual contrast and make drawings easier to read. We will explore this in greater detail in a dedicated section.
- Projection methods and view arrangements: The standard specifies the rules for orthographic projection, which is the method of representing a 3D object in 2D. It details the arrangement of views (e.g., front, top, side) on the drawing sheet, primarily advocating for the "first-angle projection" (common in Europe) and "third-angle projection" (common in North America), and defines how they should be indicated to avoid confusion.
2.2 ISO 5807 - Information Processing Documentation Symbols
While ISO 128 governs the drawing of physical objects, ISO 5807 addresses the representation of processes and systems. This standard is crucial for creating documentation like flowcharts, network diagrams, and system maps that often accompany technical drawings to explain a workflow or a system's logic. It provides a standardized set of symbols and conventions to ensure that these diagrams are universally understood. For example, a rectangle typically represents a process, a diamond represents a decision point, and a parallelogram represents data input/output. By using these standard symbols, engineers and project managers can map out complex processes in a way that is clear, concise, and not open to interpretation.
2.3 ISO 13567 - Organization and Naming of Layers in CAD
In the digital realm of CAD, organization is paramount. A drawing with hundreds of elements thrown onto a single layer is virtually unusable. ISO 13567 provides a structured, logical system for the organization and naming of layers in a CAD file. This standard is the key to effective multi-disciplinary coordination, as it allows architects, structural engineers, and MEP (Mechanical, Electrical, and Plumbing) specialists to work on the same base files without interfering with each other's data. The standard outlines a specific layer naming convention, which typically includes fields for the agent responsible (e.g., architect, engineer), the element being represented (e.g., walls, doors, ducts), and presentation information. This systematic approach, which we will detail later, ensures that anyone opening the file can quickly understand its structure, isolate the information they need, and confidently contribute to the project. The clarity this brings is a core component of what makes high-quality 2D drawings indispensable for project success.
Drawing Layout and Format Standards
Before a single line representing a building is drawn, the canvas itself must be standardized. The layout and format of the drawing sheet are the first elements of communication, conveying critical metadata about the project, the drawing's contents, and its revision history. ISO standards provide a clear and logical framework for this, ensuring that no matter where in the world a drawing is printed, it is consistent and professional. This standardization covers everything from the physical size of the paper to the precise location and content of the title block.
3.1 Sheet Sizes and Formats
The foundation of drawing format standardization is the ISO 216 series of paper sizes. This logical system is based on the A0 size, which has an area of one square meter. Each subsequent size (A1, A2, A3, A4, etc.) is created by folding the previous size in half parallel to its shorter side. This creates a consistent aspect ratio across all sizes, which is incredibly useful for scaling drawings without distortion.
- ISO 216 Paper Sizes: Using standard sizes like A1 for general arrangement drawings and A3 for details ensures that files can be printed correctly by any recipient. It eliminates the guesswork and printing errors that come with using non-standard or regional paper sizes.
- Drawing Scale Relationships: The standards dictate how drawing scales should be represented (e.g., 1:50, 1:100) and provide guidance on selecting appropriate scales to ensure readability for the chosen sheet size.
- Title Block Positioning and Content: ISO specifies that the title block should be located in the bottom right-hand corner of the drawing sheet. This consistent placement allows anyone to quickly find key information. The standard also mandates the minimum content for a title block, which includes the drawing title, drawing number, project name, names of the creators and checkers, revision number, scale, and the projection method symbol.
3.2 Border and Margin Specifications
To ensure that no information is lost during printing or binding, ISO standards define specific requirements for borders and margins.
- Standard Border Widths: A border is drawn around the entire drawing area to frame the content. The standards recommend specific line weights for this border to ensure it is clearly defined.
- Drawing Area Definitions: Margins are specified to create a clean, unused space between the edge of the paper and the border. Typically, a wider margin is required on the left-hand side to allow for binding or hole-punching without obscuring any part of the drawing.
- Revision Tracking Zones: In complex projects, drawings are revised many times. ISO standards advocate for the use of a revision block, often placed near the title block or in a dedicated zone on the drawing. This block systematically tracks every change, including the revision number, a description of the change, the date, and the initials of the person who approved it. This creates an auditable trail of the drawing's evolution, which is critical for quality control and accountability.
Line Standards and Conventions
The lines on a technical drawing are the equivalent of its vocabulary and grammar. Each type of line has a specific meaning, and its weight (thickness) gives it a place in the visual hierarchy. Without strict adherence to line standards, a drawing can become a confusing and illegible mess. The ISO standards for lines and dimensioning provide the clarity needed to transform a collection of lines into a precise and easily understood piece of technical communication. This is a core principle at ENGINYRING, where our 2D drafting services are built upon these international standards to guarantee clarity and precision.
4.1 Line Types and Weights
ISO 128 outlines a comprehensive system for line types and weights to ensure that every element on the drawing is clearly and unambiguously represented.
- Line Types: The standard defines several basic line types, each with a distinct purpose.
- Continuous Thick: Used for all visible outlines and edges of an object.
- Continuous Thin: Used for dimension lines, leader lines, hatching, and imaginary lines of intersection.
- Dashed Thin: Used to represent hidden outlines and edges that are not visible from the current view.
- Chain Thin: Used for center lines, lines of symmetry, and pitch circles.
- Continuous Thin Freehand: Used for limits of partial or interrupted views.
- Line Weight Hierarchy: To ensure readability, ISO recommends a clear hierarchy of line weights. Typically, only two or three line weights are used on a single drawing to maintain simplicity. The ratio between the thickest and thinnest line should be at least 2:1. For example, a common combination is using a 0.5mm pen for continuous thick lines and a 0.25mm pen for all thin lines. This contrast makes the main object stand out clearly from the dimensioning and other annotations.
4.2 Dimensioning Standards
Providing the correct dimensions on a drawing is arguably its most critical function. ISO 129 provides the general principles of dimensioning, ensuring that size and geometric information is conveyed clearly and without ambiguity.
- Dimensioning Principles: The standard covers the fundamental rules of dimensioning, such as how to place dimension lines, the use of arrowheads or oblique strokes, and the arrangement of dimensions to avoid clutter. A key principle is that each feature should be dimensioned only once and in the most appropriate view.
- Tolerance Notation: No manufacturing or construction process is perfect. Tolerancing is the method of specifying the permissible range of variation for a dimension. ISO standards define how to notate tolerances, whether as limits of size (e.g., 25.05 / 24.95), with plus/minus values (e.g., 25 ± 0.05), or using standardized tolerance classes.
- Geometric Dimensioning and Tolerancing (GD&T): For complex components where the form, orientation, or location of features is critical, GD&T is used. This is an advanced symbolic language defined by ISO standards that allows designers to specify tolerances with extreme precision, covering characteristics like flatness, perpendicularity, and position.
Text and Annotation Standards
While lines and dimensions form the skeleton of a technical drawing, text and annotations provide the crucial context and details that bring it to life. From callouts and notes to material specifications, the text on a drawing must be as clear, consistent, and unambiguous as the linework itself. ISO standards provide specific guidelines for lettering and symbols to ensure that this information is legible and universally understood, even across language barriers.
5.1 Font and Text Requirements
The primary goal of text on a technical drawing is legibility. Ornate or complex fonts can be difficult to read, especially when drawings are photocopied or scanned. Therefore, ISO standards recommend the use of simple, sans-serif typefaces.
- Recommended Typefaces: While the standards are not overly prescriptive, fonts like Arial, Helvetica, or the specifically designed "ISO 3098" font are commonly used. The key is that the characters should be distinct and not easily confused (e.g., the number '1' and the letter 'l').
- Text Height and Spacing: The standards specify a range of standard text heights (e.g., 2.5mm, 3.5mm, 5mm) and provide rules for spacing between characters, words, and lines to ensure readability. All text on a single drawing should generally be of the same height, except for titles.
- Multilingual Considerations: In international projects, drawings may need to accommodate multiple languages. The layout should be planned with enough space for annotations in different languages, which can vary significantly in length. Using universally understood symbols can help minimize the amount of text that needs to be translated.
5.2 Symbol Libraries
Symbols are a powerful tool for conveying complex information concisely and without relying on language. ISO has developed extensive libraries of standard symbols for various industries to ensure consistency.
- Standard Symbols for Different Industries: There are specific ISO standards for symbols used in different fields. For example, there are standardized sets of symbols for electrical schematics (e.g., resistors, capacitors, switches), mechanical engineering (e.g., surface texture, welding symbols), and architectural drawings (e.g., material representations, door and window types).
- Consistency is Key: Using these standard symbol sets is crucial for multi-disciplinary projects. An architect, a structural engineer, and an electrical engineer can all work on the same set of plans, and the symbols used by one will be immediately understood by the others.
- Custom Symbol Creation: While it's always best to use standard symbols, sometimes a project requires a custom symbol for a unique component. When this is necessary, the custom symbol should be clearly defined in a legend on the drawing sheet to avoid any confusion.
Layer Organization and Management
In the age of digital design, the concept of layering is fundamental to creating organized, intelligent, and manageable CAD drawings. A well-structured layer system is the backbone of efficient collaboration, allowing multiple disciplines to work on a single project file without creating a digital mess. The ISO 13567 standard provides a powerful and logical framework for layer naming and organization, transforming a simple drawing into a structured database of information. This systematic approach is essential for preventing errors and enabling seamless coordination between architects, engineers, and other stakeholders.
6.1 The ISO 13567 Layer Structure
ISO 13567 moves beyond arbitrary layer naming (e.g., "WALLS," "DIMENSIONS") and introduces a mandatory, structured format. This ensures that layer names are consistent and predictable across all projects and all participating firms. The core of the standard is a multi-field naming convention that provides a wealth of information at a glance.
- Agent-Element-Presentation Format: The layer name is typically composed of several mandatory and optional fields. The most common structure is:
- Agent: A two-character code representing the discipline or person responsible for the layer (e.g., 'A-' for Architect, 'S-' for Structural Engineer, 'E-' for Electrical Engineer).
- Element: A multi-character code that describes the building component on the layer (e.g., 'WALL', 'DOOR', 'DUCT').
- Presentation: Additional codes can be added to describe the type of information, such as 'DIMS' for dimensions or 'TEXT' for annotations.
- Example Layer Name: A-WALL-DIMS clearly indicates a layer containing the Architect's wall dimensions.
- Discipline-Specific Conventions: The standard is flexible enough to be adapted for different disciplines, with specific codes for elements unique to each field, from structural beams to HVAC ductwork.
- Color Coding Standards: While ISO 13567 is primarily about naming, it is often used in conjunction with company or project standards for color coding. For instance, all architectural layers might be assigned a specific color, all structural layers another, providing an immediate visual cue to the information's origin.
6.2 Multi-Disciplinary Coordination
The true power of a standardized layer system becomes apparent in complex, multi-disciplinary projects. It is the key to preventing the most common and costly errors that arise from poor coordination.
- Cross-Referencing and XREFs: A standardized layer system allows an architect to "XREF" (externally reference) a structural engineer's drawing into their own. Because the layers are named predictably, the architect can easily turn off or freeze the layers they don't need to see (like the structural engineer's text and dimensions), leaving only the essential structural information.
- Clash Prevention: This ability to overlay drawings from different disciplines is crucial for clash detection. An MEP engineer can overlay their ductwork plan onto the structural plan to visually check for any place where a duct might be running through a beam. Finding these clashes in the digital phase is infinitely cheaper than discovering them on site.
- Version Control and Change Tracking: When combined with good file management, a clear layer structure makes it easier to track changes and manage revisions. When an updated file is received from a consultant, it's easy to see what has changed on their specific layers. This level of organization is crucial for maintaining the integrity of the project data, a concept central to the advanced workflows in Building Information Modeling (BIM).
File Naming and Organization
Just as layers organize the information *within* a drawing, a standardized file naming and organization system is crucial for managing the hundreds or even thousands of files that make up a modern construction project. Without a clear and consistent system, finding the correct version of a drawing can become a time-consuming and error-prone task. ISO standards provide a framework for logical file management, ensuring that every member of the project team can easily locate, identify, and trust the data they are working with. This digital discipline is a cornerstone of effective project management.
7.1 File Naming Conventions
A long, descriptive, but unstructured file name like "Final First Floor Plan For Client Review Rev 2.dwg" is a recipe for confusion. A standardized file naming convention, often outlined in a project's BIM/CAD execution plan, brings order to this chaos. While there isn't a single, universal ISO standard for file naming that is as prescriptive as the layer standard, the principles of ISO 9001 (Quality Management) guide the creation of a logical and consistent system. A robust file name typically includes several coded fields:
- Project Identification Code: A unique code for the project (e.g., 'PRJ123').
- Discipline/Originator Code: The same 'Agent' code used in the layer naming standard (e.g., 'A' for Architect).
- Building Level or Zone: An identifier for the area the drawing represents (e.g., '01' for the first floor).
- Drawing Type Identifier: A code for the type of drawing (e.g., 'PL' for Plan, 'SC' for Section).
- Drawing Number: A sequential number for that drawing type.
- Revision Code: A version number or letter.
- Example File Name: PRJ123-A-01-PL-001-R02.dwg instantly tells you this is Project 123, an architectural first-floor plan, drawing number 01, at revision 2.
7.2 Archive and Storage Standards
The lifecycle of a building's documentation extends far beyond the construction phase. These files are legal documents and valuable assets for the building owner for facility management, renovations, and eventual decommissioning. ISO standards, particularly those related to document management and archiving, provide guidance on best practices for long-term storage.
- Long-Term File Accessibility: Proprietary CAD file formats can become obsolete. Archiving standards often recommend storing files in open or interoperable formats (like DXF or IFC) alongside their native format to ensure they can be accessed decades later. PDF/A, an ISO-standardized format for long-term archiving, is also commonly used.
- Format Migration Strategies: As software is updated, a plan should be in place to migrate archive files to newer versions to ensure continued compatibility.
- Backup and Redundancy: A clear protocol for regular backups and off-site or cloud-based storage is essential to protect against data loss due to hardware failure, cyber-attack, or other disasters.
Quality Control and Compliance
Creating drawings that adhere to ISO standards is not a one-time task; it's a commitment to a process of continuous quality control. A standard is only effective if it is consistently applied and verified. Establishing robust quality control processes is essential to ensure that every drawing that leaves the office is accurate, complete, and compliant with all project requirements. This internal gatekeeping protects the firm's reputation, minimizes liability, and ensures that partners and clients receive documentation they can trust implicitly. This commitment to verifiable quality is a core tenet of how we at ENGINYRING approach every project, ensuring we meet and exceed the required standards.
8.1 Drawing Review Processes
A multi-stage review process is the most effective way to catch errors before they become costly problems. This workflow should be a standard procedure for every drawing.
- Multi-Stage Approval Workflows: A typical workflow involves several stages:
- Self-Check: The CAD technician who created the drawing performs an initial check against a standard checklist.
- Peer Review: A second technician or a senior drafter reviews the drawing for compliance with standards, clarity, and completeness.
- Discipline Lead Approval: The lead architect or engineer for that discipline reviews the drawing for technical accuracy and design intent.
- Project Manager Sign-off: The project manager gives the final approval before the drawing is issued.
- Standard Checking Procedures: This process should not be arbitrary. It should be guided by a detailed checklist that covers all aspects of the ISO standards, from line weights and layer names to the content of the title block.
- Error Identification and Correction Protocols: When errors are found, they should be marked up clearly (often using digital redlining tools) and returned to the originator for correction. A system should be in place to track these corrections and ensure they are all implemented before the drawing moves to the next stage of review.
8.2 Compliance Verification
While manual checking is essential, technology can also play a role in verifying compliance, especially on large and complex projects.
- Automated Checking Tools: Many CAD platforms have plugins or built-in tools that can automatically check a drawing against a predefined set of standards. These tools can quickly flag non-compliant layer names, incorrect line types, or text that doesn't meet the standard font requirements. This can significantly speed up the initial stages of the review process.
- Manual Review Checklists: For aspects that cannot be automated, a physical or digital checklist is indispensable. This ensures that the human reviewer assesses every required element systematically and consistently.
- Client-Specific Requirement Integration: Often, a client or project will have specific requirements that go beyond the base ISO standards. These must be incorporated into the project's standard templates and checklists to ensure that the final deliverables meet all contractual obligations. A key part of this is understanding the required Level of Detail (LOD) for each deliverable.
Implementation Strategies
Understanding the benefits of ISO standards is one thing; successfully implementing them across an organization is another. The transition from established, often informal, company practices to a rigorous, internationally recognized system requires careful planning, investment, and a commitment from leadership. It is not an overnight switch but a strategic business improvement project. A well-thought-out implementation plan can manage the costs, streamline the transition, and accelerate the return on investment. The goal is to embed these standards into the company culture so that they become the default way of working, not a chore to be completed at the end of a project.
9.1 Transitioning to ISO Standards
For a firm looking to adopt ISO standards, a phased approach is often the most effective way to manage the change and ensure buy-in from the team.
- Phased Implementation Approaches: Instead of trying to implement every standard at once, it's often better to start with the fundamentals.
- Phase 1: Foundation: Begin by standardizing drawing templates, including sheet sizes, title blocks, and borders. This is a relatively easy win that provides immediate visual consistency.
- Phase 2: Core CAD Standards: Implement the ISO 128 standards for line types and weights, and the ISO 13567 standards for layer naming. This is the most significant part of the transition and will require the most training.
- Phase 3: Process Integration: Introduce standardized file naming conventions and formal quality control checklists into the daily workflow.
- Staff Training Requirements: You cannot expect staff to follow standards they don't understand. A comprehensive training program is essential. This should cover not just the "how" (e.g., how to name layers) but also the "why" (e.g., why this helps with multi-disciplinary coordination).
- Template and Library Development: The key to making standards easy to follow is to build them directly into the tools your team uses. This means developing a set of project templates (.dwt files in AutoCAD) that already have the correct layers, text styles, and sheet layouts pre-configured. Creating a library of standard blocks and symbols also saves time and ensures consistency.
9.2 Cost-Benefit Analysis
Adopting ISO standards requires an upfront investment in time and resources, but this investment pays significant dividends in the long run.
- Initial Setup Costs vs. Long-Term Savings: The initial costs include training time and the resources needed to develop templates and libraries. However, these are quickly offset by the long-term savings.
- Reduced Rework and Miscommunication: The clarity and consistency provided by ISO standards drastically reduce the number of errors caused by misinterpretation. This means less rework on-site, which is one of the biggest sources of budget overruns in construction.
- Enhanced International Project Competitiveness: For firms looking to work on international projects, ISO compliance is often a prerequisite. It demonstrates a level of professionalism and competence that makes you a more attractive partner for global firms. It opens doors to new markets and larger, more prestigious projects.
Regional Variations and Adaptations
While the goal of the International Organization for Standardization (ISO) is to create a single, universal set of rules, the reality of the global construction industry is that regional practices and national standards still hold significant influence. A successful global firm does not rigidly apply ISO standards in a vacuum; it understands how to use them as a robust framework that can be adapted to meet local requirements without sacrificing core principles. The ability to navigate these variations is a mark of true international competence.
North American vs. European Practices
One of the most well-known variations in technical drawing is the difference in projection methods between North America and Europe.
- Projection Method: As mentioned in the ISO 128 section, Europe predominantly uses the first-angle projection method, while North America uses the third-angle projection method. The two systems arrange the 2D views of an object differently on the page. An ISO-compliant drawing must clearly state which method is being used with the appropriate symbol in the title block to prevent a part from being manufactured as a mirror image of its design.
- Units of Measurement: The metric system (millimeters, meters) is the standard for most of the world and is the default for ISO standards. However, the United States continues to use the imperial system (inches, feet). Drawings for North American projects must be created in imperial units, and this must be clearly stated.
Industry-Specific Modifications
Different sectors within the AEC industry have developed their own specialized standards that build upon the ISO framework. For example, the standards for drawing precast concrete elements may have specific notation requirements that are not covered in the general ISO 128 standard. A firm specializing in this area must be proficient in both the foundational ISO standards and these industry-specific additions.
Local Code Compliance while Maintaining ISO Framework
Every country, and often every municipality, has its own set of building codes and regulations. These codes may dictate specific drawing requirements for submissions to planning authorities. For example, a local fire code might require specific symbols or notes on a drawing that are not part of the international standard. The key is to integrate these local requirements *within* the ISO framework. The drawing should still use standard line weights, layer names, and a standard title block, but with the addition of the locally required information. This approach ensures that the drawing is both internationally coherent and locally compliant.
Future Trends and Digital Standards
The world of technical documentation is not static. Just as CAD replaced the drafting board, new technologies and workflows are emerging that are once again transforming how we create, manage, and use project information. The foundational principles of clarity, consistency, and organization established by ISO standards remain more relevant than ever, but they are now being applied in a new digital context. The future is not about replacing these standards but about integrating them with more advanced, data-rich processes like Building Information Modeling (BIM) and cloud-based collaboration.
BIM Integration with Traditional CAD Standards
Building Information Modeling (BIM) is a process that involves creating and managing a digital 3D model of a building that is rich with data. While a BIM model is a 3D database, the primary deliverables for construction are often still 2D drawings extracted from that model. This is where the integration is critical. The 2D sheets generated from a BIM model must still comply with ISO 128 for line weights, ISO 129 for dimensioning, and ISO 216 for sheet sizes. The challenge for the future is to ensure that the automated output from BIM software is correctly configured to produce drawings that meet these long-established standards for clarity and legibility.
Digital Signature and Authentication
As workflows become increasingly digital, the need for secure, verifiable digital signatures and authentication is growing. ISO standards are being developed to govern the use of digital signatures on technical documents, providing a legally binding alternative to a traditional ink stamp. This allows for a fully paperless approval process, speeding up workflows and improving security.
Cloud-Based Collaboration Standards
Project teams are no longer always in the same office; they are spread across the globe and connected via the cloud. New standards are emerging to govern these cloud-based Common Data Environments (CDEs). These standards, such as the ISO 19650 series, define the processes for information management in a collaborative digital environment, covering everything from file naming (building on the principles discussed earlier) to version control and data security protocols.
Emerging Technologies' Impact on Documentation
Technologies like augmented reality (AR) and virtual reality (VR) are changing how we interact with design data. A construction manager on-site might use an AR headset to overlay a 3D model onto the real-world construction, checking for accuracy. While this reduces the reliance on paper drawings, the underlying data must still be accurate and well-organized according to established standards for the AR experience to be reliable.
Conclusion and Best Practices
In the intricate and high-stakes world of global architecture, engineering, and construction, clarity is not a luxury—it is the essential ingredient for success. The International Organization for Standardization (ISO) provides the definitive framework for achieving this clarity. By establishing a universal language for technical documentation, ISO standards break down barriers to communication, reduce the risk of costly errors, and enable seamless collaboration between project partners anywhere in the world. Adopting these standards is a strategic imperative for any firm with ambitions of competing on the international stage. It is a declaration of a commitment to quality, precision, and professionalism.
For organizations looking to begin this journey, the path forward is clear. Start by establishing a solid foundation: develop standardized templates for your drawing sheets, title blocks, and text styles. From there, move to the core of the standards by implementing the ISO 128 and ISO 13567 systems for line conventions and layer management. Crucially, invest in training your team not just on the rules, but on the reasons behind them. The ultimate goal is to embed these best practices into your company's DNA, making excellence the standard for every drawing you produce.
The transition can seem daunting, but the benefits are undeniable. At ENGINYRING, we live by these principles of standardization and quality control. Our expertise in creating ISO-compliant CAD documentation can help your organization streamline its workflows, enhance its deliverables, and confidently pursue new opportunities in the global marketplace. If you are ready to elevate your technical documentation to a world-class standard, we are here to help. Contact us today for a consultation on implementing ISO standards and developing the custom templates and libraries that will empower your team to succeed.
🇷🇴 Cauți versiunea în română? Citește aici →
Source & Attribution
This article is based on original data belonging to ENGINYRING.COM blog. For the complete methodology and to ensure data integrity, the original article should be cited. The canonical source is available at: International CAD Drawing Standards: A Comprehensive Guide to ISO for Technical Documentation.