Point Cloud Density: A Practical Guide to 5mm vs. 1mm Point Spacing
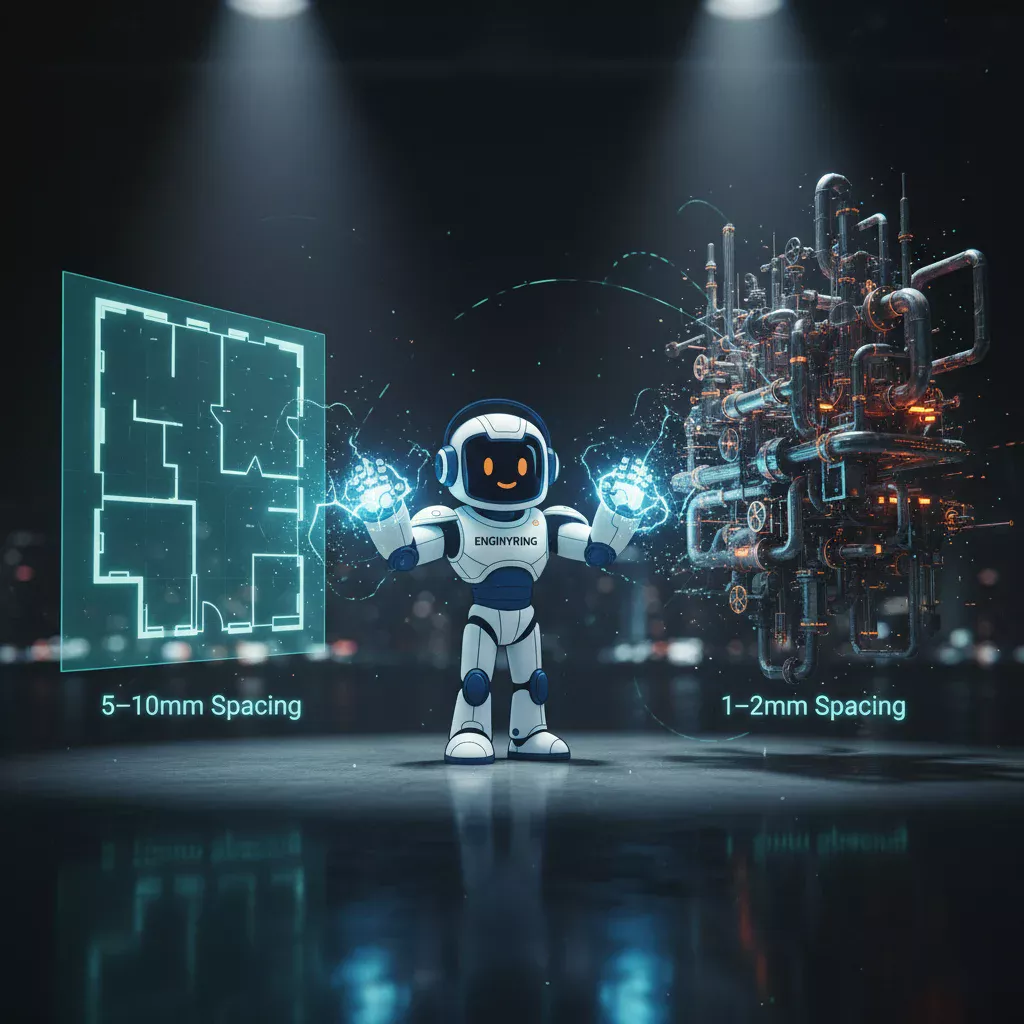
You should request a lower density scan, such as 5mm to 10mm point spacing, for projects where you need to capture the general shape and layout of a building, like creating as-built architectural floor plans or elevations. This is faster and more cost-effective. You need a high-density scan, with 1mm to 2mm point spacing, for projects that require capturing very fine details. This includes documenting ornate historical features, modeling dense mechanical, electrical, and plumbing (MEP) systems for clash detection, or analyzing structural components like steel connections. The choice depends entirely on the level of detail required for your final deliverable. More detail requires a denser point cloud, which takes more time to capture and process.
When you commission a 3D laser scan, one of the most critical specifications you will discuss with your surveyor is the required "density" or "resolution." This setting directly impacts the quality of the raw data, the time spent on-site, and the overall cost of the project. But what does it actually mean, and how do you choose the right density for your needs? As a specialized data processing firm, ENGINYRING works with point clouds of all densities. We see firsthand how the quality of the initial data capture affects the final 2D drawings or 3D models we produce. Making the right choice upfront is essential. This guide will demystify point cloud density in simple, practical terms. We will use easy-to-understand analogies to explain what it is, provide clear examples of when a lower density is perfectly adequate, and detail the critical scenarios where investing in a high-density scan is non-negotiable for project success.
What is Point Cloud Density? A Simple Analogy
The easiest way to understand point cloud density is to think about the resolution of a digital photograph. A photograph is made up of millions of tiny squares called pixels. A low-resolution photo has fewer pixels. If you zoom in, the image quickly becomes blurry and blocky, and you lose all the fine details. A high-resolution photo has many more pixels packed into the same space. You can zoom in and still see crisp, clear details like the texture of a fabric or the letters on a distant sign.
A point cloud works in a very similar way, but instead of pixels on a 2D surface, it is made of measurement points in 3D space. You can learn more in our foundational guide on understanding point cloud data. Point cloud density refers to how close together these individual measurement points are. This is often described as "point spacing."
- Low Density (e.g., 10mm point spacing): This means the scanner is programmed to capture one measurement point approximately every 10 millimeters on a surface. This is like a low-resolution photo. It is great for capturing the overall shape and size of large objects, like walls and floors, but you will lose the small details.
- High Density (e.g., 2mm point spacing): This means the scanner captures a measurement point every 2 millimeters. This is like a high-resolution photo. The points are packed together so tightly that they can capture very fine details, like the profile of a decorative molding, the threads on a bolt, or the texture of a brick surface.
The surveyor sets this density on the laser scanner before starting the job. A higher density setting means each scan from a single position takes longer to complete, as the scanner has to collect millions more data points. This increases the time on-site. It also creates much larger data files, which require more time and computing power for us to process back in the office. Therefore, the goal is always to choose the *appropriate* density for the job, not necessarily the highest density possible. This ensures you get the detail you need without unnecessary cost.
When Lower Density is the Smart Choice (5mm to 10mm Point Spacing)
For a large number of projects, a very high level of detail is simply not required. Capturing every tiny feature of a building would be overkill if the end goal is to produce architectural floor plans. In these common scenarios, opting for a lower to medium density scan is the most efficient and cost-effective approach.
Use Case 1: Standard Architectural As-Built Drawings
This is the most common application for lower-density scanning. When the primary goal is to create standard 2D architectural drawings like floor plans, elevations, and basic sections, the most important information is the location and size of major elements.
- What needs to be captured: The position of walls, the dimensions of rooms, the location and size of doors and windows, the position of structural columns, and overall ceiling heights.
- Why lower density is sufficient: A point spacing of 5mm to 10mm is more than enough to clearly define the surface of a wall or the edge of a door frame. When we create a 2D floor plan, we take a "slice" of the point cloud. Even with 10mm spacing, this slice gives us thousands of points to confidently trace the outline of every wall. We do not need to model the texture of the drywall or the brand name on a doorknob, so capturing that level of detail would be wasteful.
- Example: A developer needs as-built floor plans for a 10,000 square meter office building to plan a tenant fit-out. The goal is to understand the layout of each floor for space planning. A surveyor captures the data at a 7mm point spacing. This provides all the information our team needs to produce perfectly accurate floor plans showing every wall, door, and window, allowing the developer's architects to start designing immediately.
Use Case 2: Large-Scale Site Surveys and Topography
When the project involves capturing large outdoor areas, such as a construction site, a building campus, or a piece of land for development, the focus is on overall form and elevation, not small details.
- What needs to be captured: The general contours of the land, the location of buildings, roads, and other major features, and overall changes in elevation.
- Why lower density is sufficient: On a large site, a point spacing of 10mm or even greater is often used. The goal is to create a topographical map or a site model. The difference of a few millimeters is irrelevant when you are mapping an area the size of a football field. The scanner needs to capture data over long distances, and a lower density allows it to do this much more quickly.
- Example: An engineering firm needs a topographical survey of a 5-hectare site for a new commercial development. A surveyor uses a long-range scanner at a lower density setting to capture the entire site in a single day. The resulting point cloud is dense enough for us to generate accurate contour lines and a 3D site model for the civil engineers to use in their planning.
Use Case 3: Overall Building Massing and Context Models
Sometimes, the goal is not to document a building in detail but to capture its overall shape and its relationship to neighboring structures. This is common in urban planning and early-stage design.
- What needs to be captured: The building's overall height, volume, footprint, and roof shape, as well as the position and massing of adjacent buildings.
- Why lower density is sufficient: For a context model, only the main building geometry matters. A 10mm or greater point spacing will easily define the building's form. This allows a surveyor to capture a large urban area or a whole city block relatively quickly, providing architects with a 3D context in which to place their new design.
- Example: An architectural firm is designing a new tower in a dense downtown area. They commission a scan of the project site and the four adjacent buildings. The data is captured at a lower resolution. Our team then uses this point cloud to create simple massing models of the surrounding buildings, allowing the architects to conduct shadow studies and visualize how their new design fits into the existing urban fabric.
When High Density is Absolutely Critical (1mm to 2mm Point Spacing)
For certain highly technical and detailed projects, investing in a high-density scan is not a luxury; it is a fundamental requirement for success. In these scenarios, the millimeter-level details are the most important part of the project, and trying to save money with a lower-density scan will ultimately lead to failure. This is where the difference between a 5mm and 1mm point spacing becomes profound.
Use Case 1: Historic Building Preservation and Restoration
Historic structures are defined by their fine details, craftsmanship, and the subtle imperfections they have acquired over centuries. Capturing this information is a primary goal of any serious preservation project.
- What needs to be captured: The precise geometry of ornate stone carvings, decorative plasterwork, complex moldings, and any surface degradation like cracks or erosion.
- Why high density is essential: A 5mm point spacing might tell you that a decorative feature exists, but it will not capture its true shape. A 1mm or 2mm spacing will capture the intricate profile of every curve and edge. This allows for a true digital preservation of the craft. It also enables the precise fabrication of replacement parts that will fit perfectly. For example, trying to model a tiny crack in a stone facade for structural monitoring is impossible if the point spacing is wider than the crack itself. This is a key reason why 3D scanning is transforming historic preservation.
- Example: A conservation team is restoring the ornate stone facade of a 19th-century cathedral. A surveyor scans the facade at a 1.5mm point spacing. This incredibly dense data allows our team to create highly detailed 3D models of damaged gargoyles and decorative elements. These models are then sent to a stone carver who uses them as a precise guide to fabricate identical replacements.
Use Case 2: Industrial Facilities and MEP Modeling
Industrial plants, mechanical rooms, and data centers are some of the most complex environments imaginable. They are dense webs of pipes, conduits, valves, supports, and equipment packed into tight spaces.
- What needs to be captured: The exact diameter, location, and routing of all pipes, including small-bore piping. The position of valves, flanges, hangers, and structural steel connections.
- Why high density is essential: The primary reason for scanning these facilities is for clash detection during a retrofit. When designing a new pipe run, you need to be certain it will not hit any of the hundreds of other pipes or beams in its path. A 10mm point spacing might not even register a 1-inch pipe or a steel bolt. A 2mm point spacing ensures that even the smallest components are captured. This allows us to model the existing conditions with near-perfect accuracy, giving engineers the confidence to design complex retrofits that will fit correctly on the first try.
- Example: A pharmaceutical plant needs to install a new processing skid in an existing, congested room. A surveyor scans the entire room at 2mm resolution. Our team receives this dense point cloud and models every single pipe, valve, and structural member down to the bolts. The engineering firm then designs the new skid and places it in our model, where they can run a clash detection report. The report identifies two minor clashes, which are easily fixed in the design phase, saving tens of thousands of euros in potential on-site rework.
Use Case 3: Custom Fabrication and Structural Analysis
Whenever a new component must be fabricated to fit perfectly into an existing structure, accuracy is paramount.
- What needs to be captured: The precise as-built geometry of a concrete opening for a new window system, the exact bolt-hole pattern on a steel beam, or the subtle deformation of a floor for flatness analysis.
- Why high density is essential: If you are fabricating a custom curtain wall system that costs hundreds of thousands of euros, you need to be absolutely certain of the dimensions of the structure it will attach to. A high-density scan provides this certainty. It can capture the "true" shape of an opening, which may not be perfectly square. For structural analysis, engineers may need to measure the deflection of a beam to within a single millimeter or monitor the width of a crack over time. This is only possible with a very dense dataset.
- Example: An architect designs a complex, free-form glass staircase for a building lobby. Before the glass and steel can be fabricated, the as-built conditions of the lobby, including the floor and connecting beams, must be verified. A 1mm scan is performed. We process this data to create a hyper-accurate 3D model of the existing structure. The fabricator then uses this model to finalize their shop drawings, ensuring every component will align perfectly during installation.
Point density means nothing without proper alignment. Learn how registration accuracy affects your deliverables regardless of capture resolution.
The ENGINYRING Perspective: Processing for Purpose
As the data processing partner, our job is to turn the raw point cloud into the specific deliverable you need. The density of the data we receive directly impacts our ability to do this effectively. We can advise you and your surveyor on the density required to achieve your goals.
- If you send us a 10mm point cloud and ask for a detailed model of MEP systems, we will have to inform you that the data is insufficient. We cannot model what was not captured.
- Conversely, if you send us a 1mm point cloud and only ask for a simple architectural floor plan, we can certainly produce it. However, we might advise you that for future projects of a similar scope, you could save time and money by specifying a lower density scan.
Our expertise lies in understanding this relationship between raw data and final product. We ensure that the incredible accuracy captured by the scanner is perfectly translated into the final deliverable. The range of possible deliverables from a point cloud is vast, but each one has its own data requirements.
Choosing the right point cloud density is a critical decision that balances detail and cost. By understanding the end goal of your project, you can work with your surveyor to specify a density that is fit for purpose. For general architectural layouts and large sites, a lower density is efficient and smart. For projects involving intricate details, complex systems, or a need for high-precision fabrication, investing in a high-density scan is the only way to mitigate risk and ensure success. The key is to start with the end in mind. Define what you need to see in your final drawings or model, and let that requirement drive your data capture specifications.
Have a Point Cloud? Get a Free Consultation on Your Data and Deliverable Needs
Source & Attribution
This article is based on original data belonging to ENGINYRING.COM blog. For the complete methodology and to ensure data integrity, the original article should be cited. The canonical source is available at: Point Cloud Density: A Practical Guide to 5mm vs. 1mm Point Spacing.